
I’ve been using ToDoist for almost a year and it’s really helped my with my longterm project planning. I’m working on a How I plan blog post. However, after a Twitter conversation I want to show you how to create task in ToDoist from a flagged email using Office365 Power Automate:
STEP 1
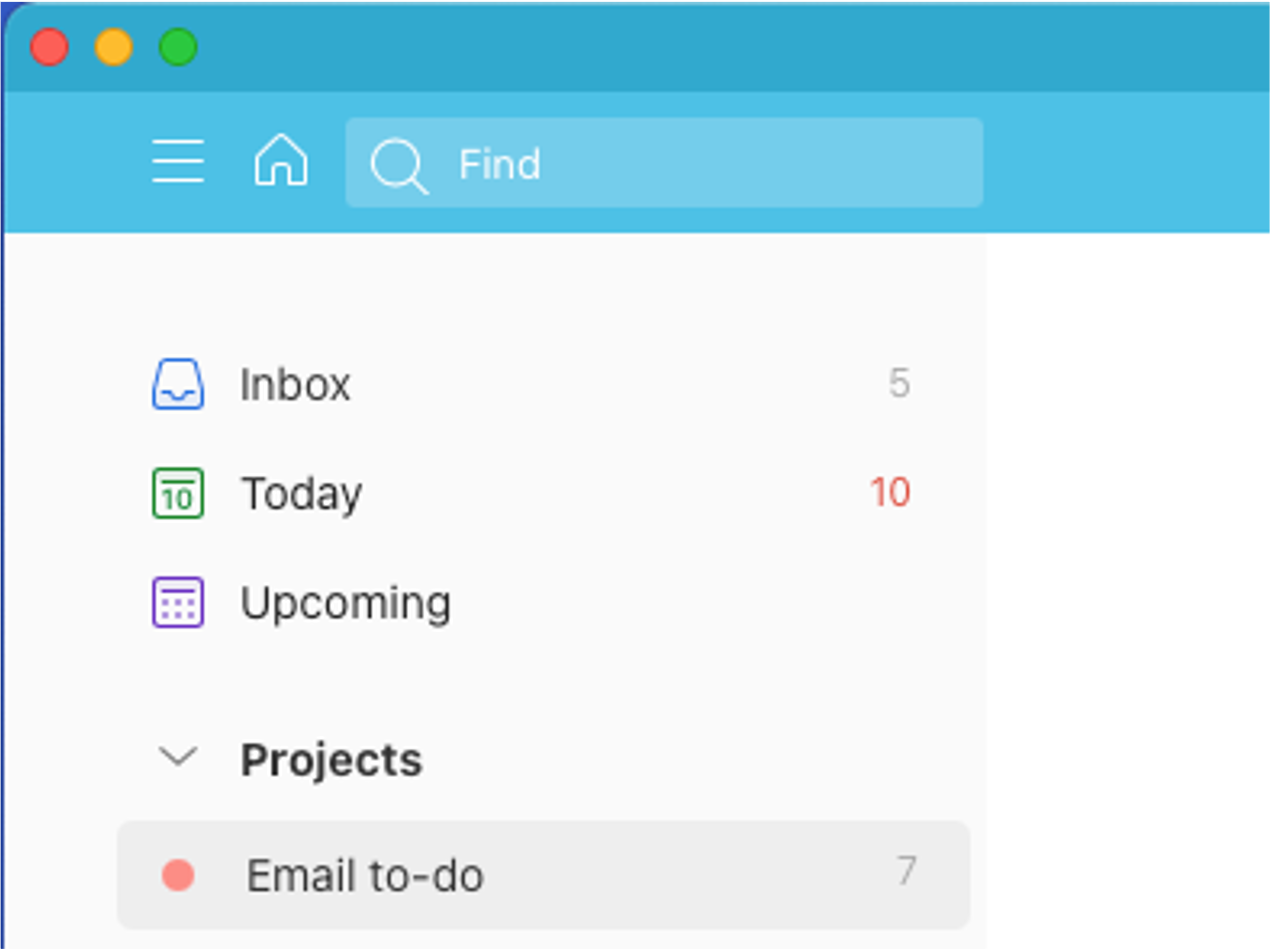
Open ToDoist and create a Project where you want to collect your flagged email tasks – mine is called Email to-do. If you don’t set up a project the tasks will go into your ToDoist Inbox by default.
STEP 2
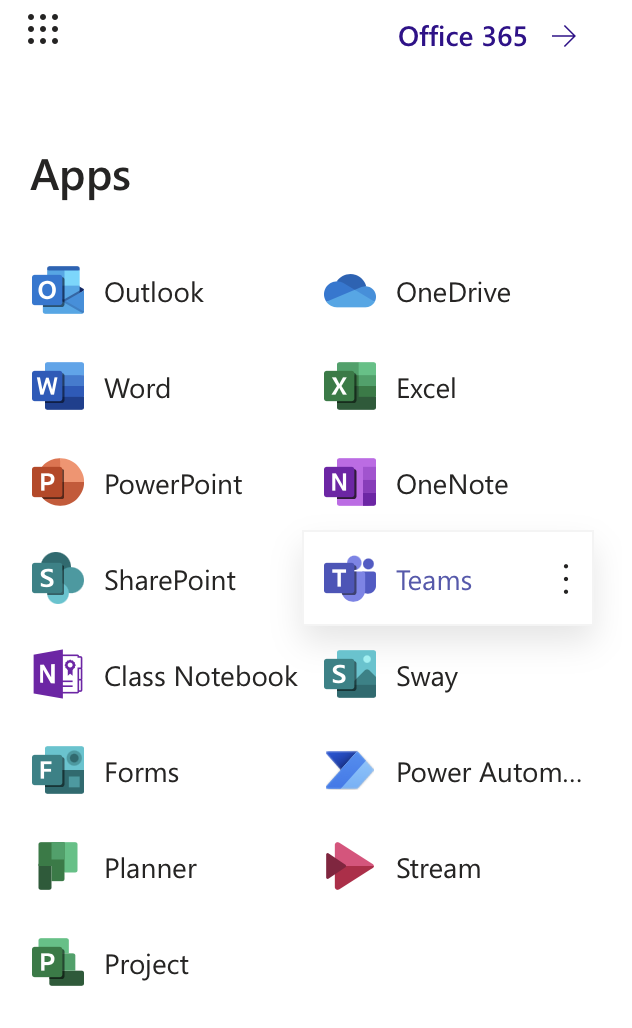
Open Office365 online, sign-in and select Power Automate from the Apps menu. Then select Create and Automated cloud flow.

STEP 3
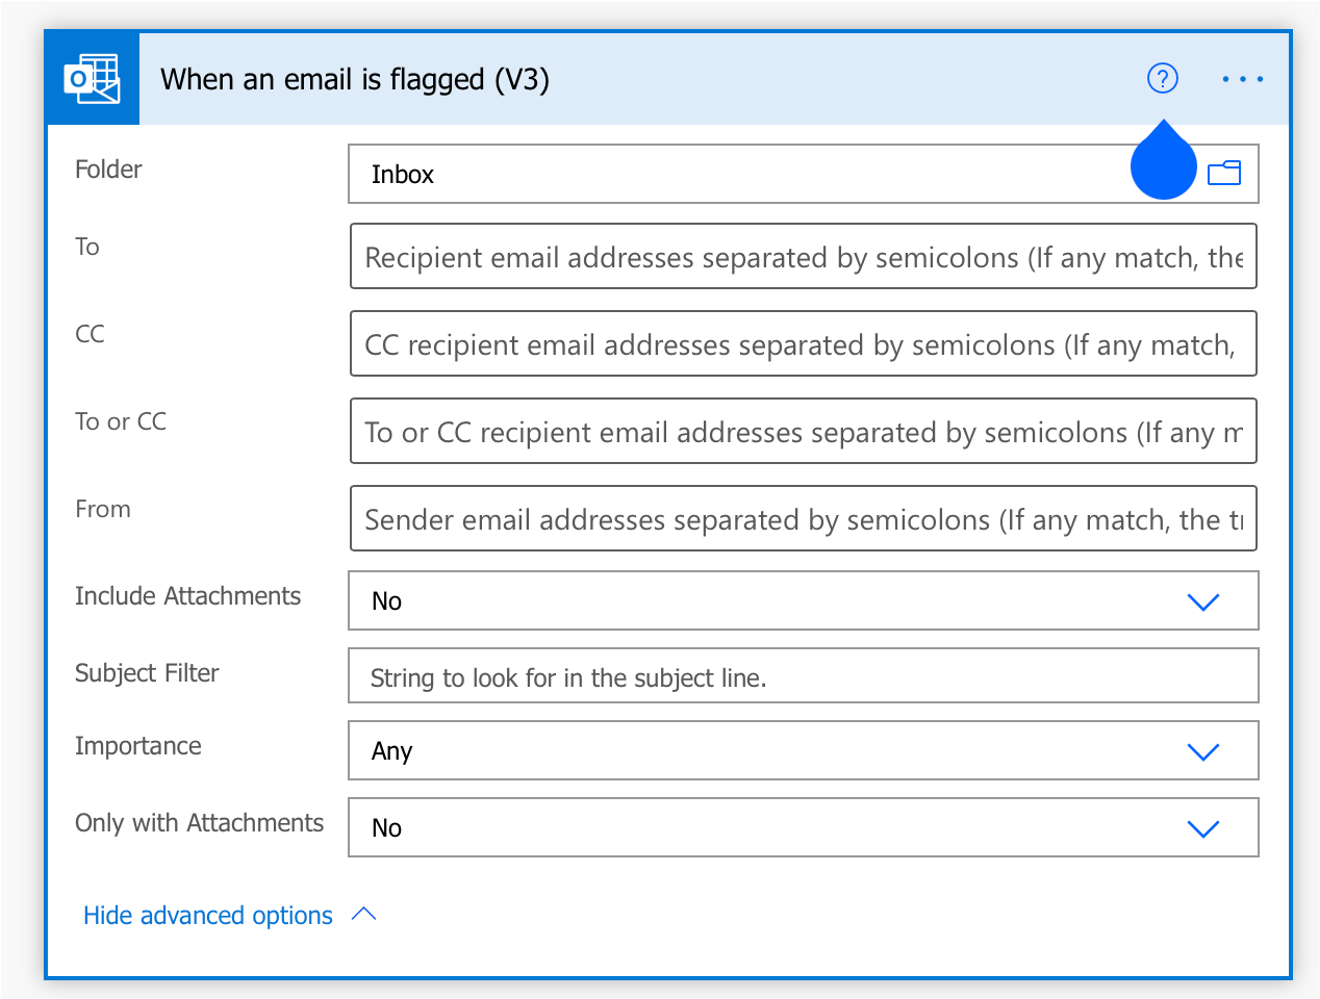
Click on cloud flow, give your flow a name e.g. ToDoist Task from Flagged email. Then search for Outlook via the Flow trigger search function and select “When an email is flagged” and click create.

STEP 4
Select the Outlook inbox you want to flag your emails in (if you want to flag from multiple inboxes you have to make a flow for each one). Then click on Advanced options if you want to include attachments etc. Then click next step.
STEP 5
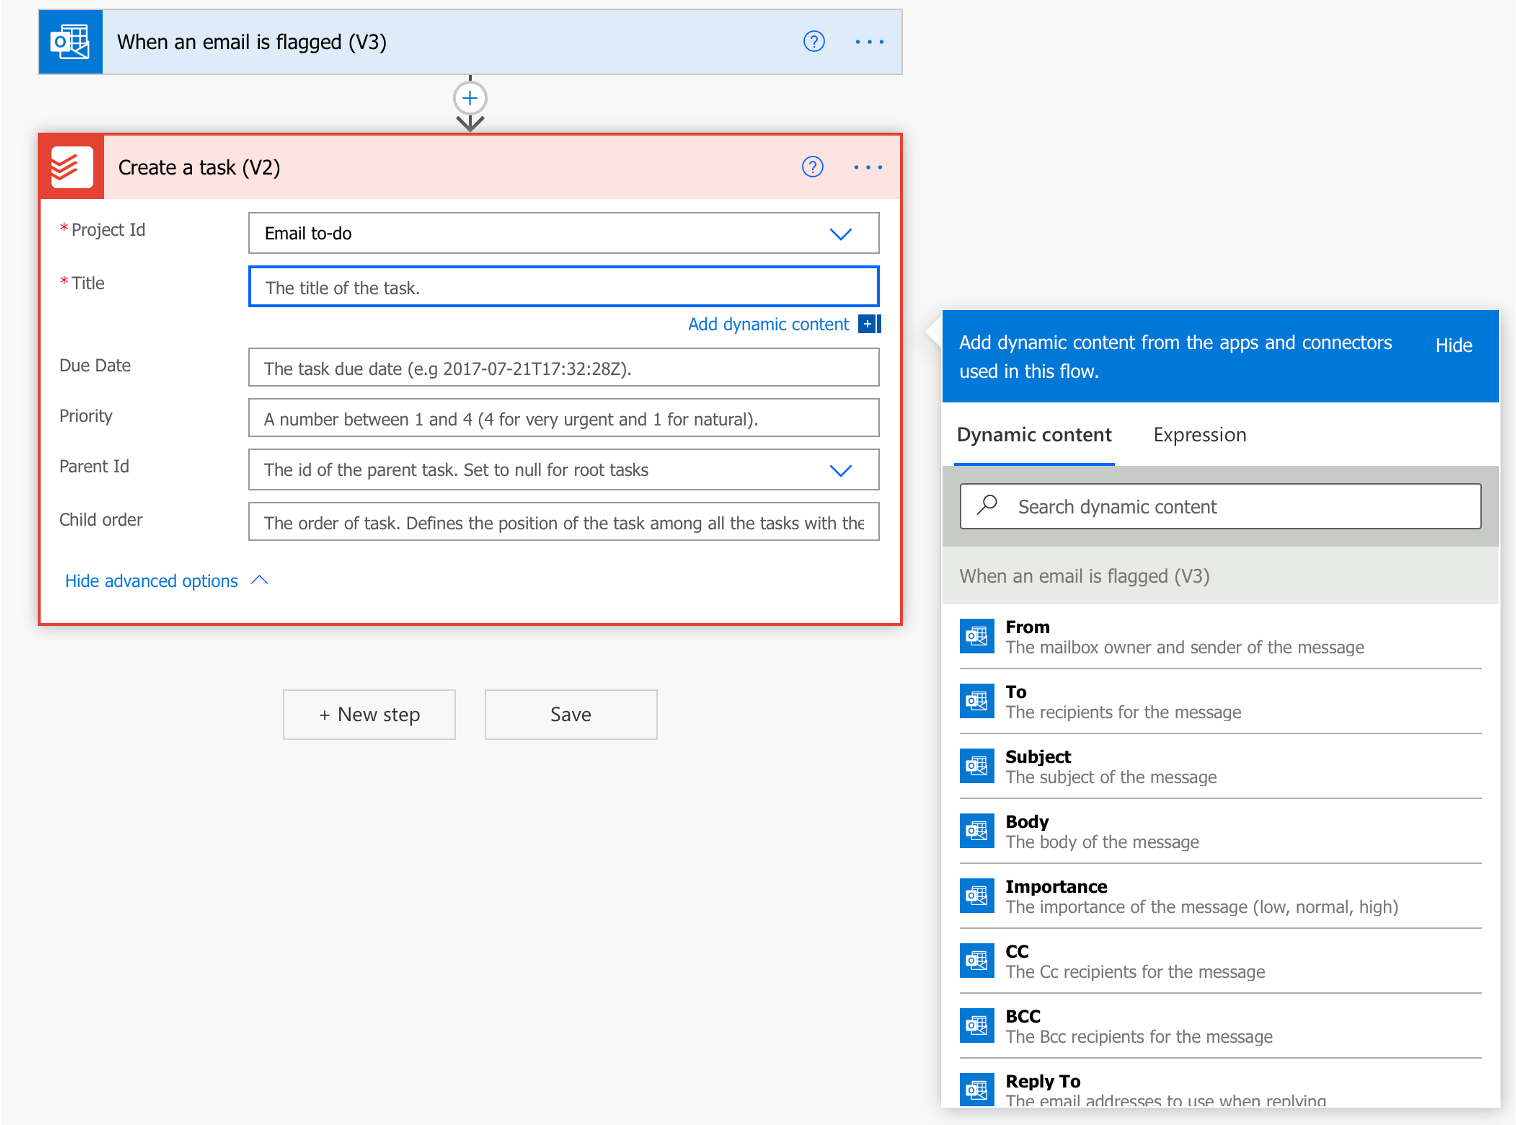
Search for ToDoist in the Choose Operation bar and select Create Task – on your first time setting this up you will have to sign in a connect your accounts.

STEP 6
Project ID is your chosen ToDoist project you want the task to be created in (e.g. Email to-do). Decide what your tasks will be called – I select the email subject header for this.

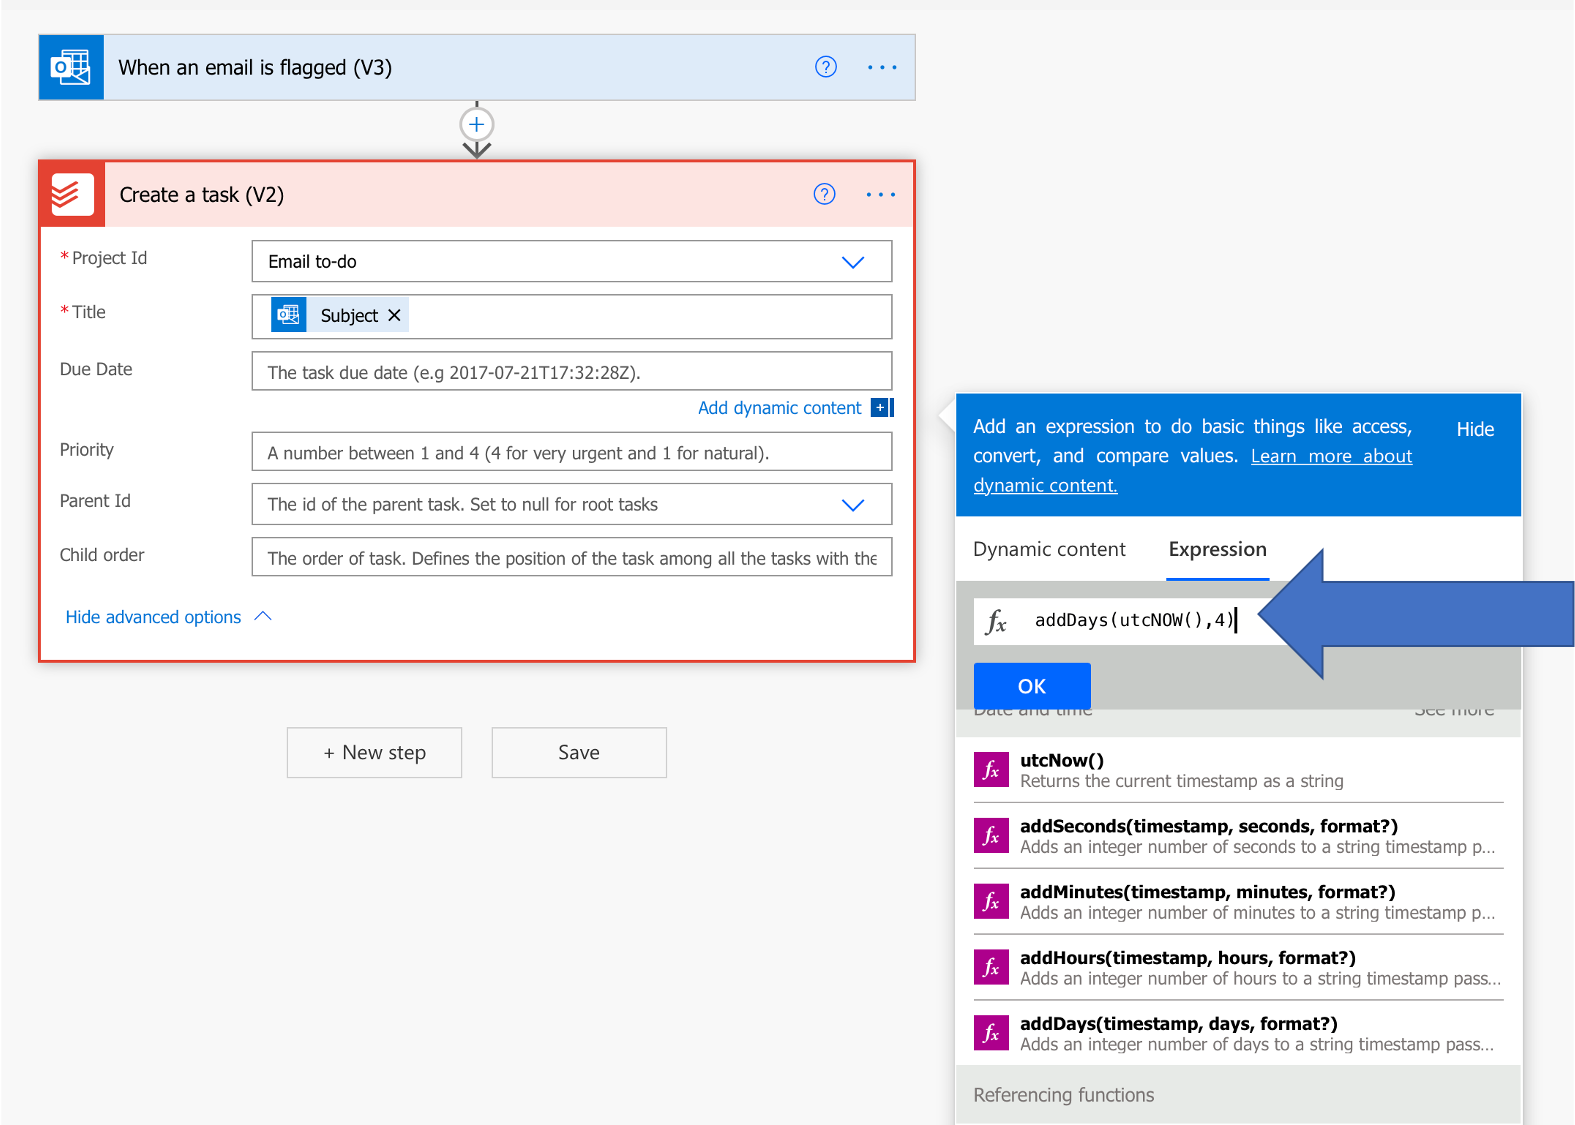
STEP 7
To set your due date for the task (the time you will received a notification from ToDoist) select Expression while in the Due Date box and type: addDays(utcNOW(),4) (see blue arrow); this will create a due date 4 days from flagging the email. Change the number to suit your planning. Click Ok. You can check out the other options and make changes if you want.
STEP 8
SAVE your flow and test it. The Flow checker will show any issues with your flow. Click Test and run your flow. Top right in your Power Automate window.

STEP 9
Check your flagged email is now a task in your chosen ToDoist project.


Nice blog post.😐 🔥 2021-06-21 05h 34min
LikeLike
Nice blog post.😃 🌞 2021-06-21 06h 27min
LikeLike
Hi Steph, good post. I wondered as someone who’s tried this out before if you’ve found a way to get the body of the e-mail added to each task? Whilst having the subject is useful, it is less functional than outlook to do. Thanks!
LikeLike
That’s a good question – I recently learned that there is a plug-in for Outlook that lets you add the email form Office365 directly to ToDoist or you can get an email for your project and email it – not sure if these could be automated though
LikeLike
Hi James. After your comments I had a play around – you can copy the email address for a project in ToDoist (click the 3 dots) and then make a flow that forwards a flagged email to this project. At the moment I can’t seem to get the automated due date to work but you get the body of the email plus a clickable link in the comment for the new task – you could then manually schedule the due date. Hope that helps
LikeLike
I have set up a Quick Step in Outlook that sends an email to Todoist and creates the task. What is frustrating is that there is no way to embed a link in the task that will open the original email from Outlook. Any ideas?
LikeLike
Hi Derek,
I was talking about the same issue with someone this morning. I haven’t found a solution yet but I will do some checking and update the post if I find anything.
LikeLike
Have you figured out two way sync? Or, have you used Outlook Tasks to sync back and forth?
LikeLike
Hi,
I don’t use sync back because I use a Bullet Journal for my daily/weekly playing so don’t need the sync back. However I did use the calendar function for a while and had a ToDoist calendar with my tasks showing. Using this link: https://todoist.com/help/articles/use-todoist-with-your-calendar
LikeLike